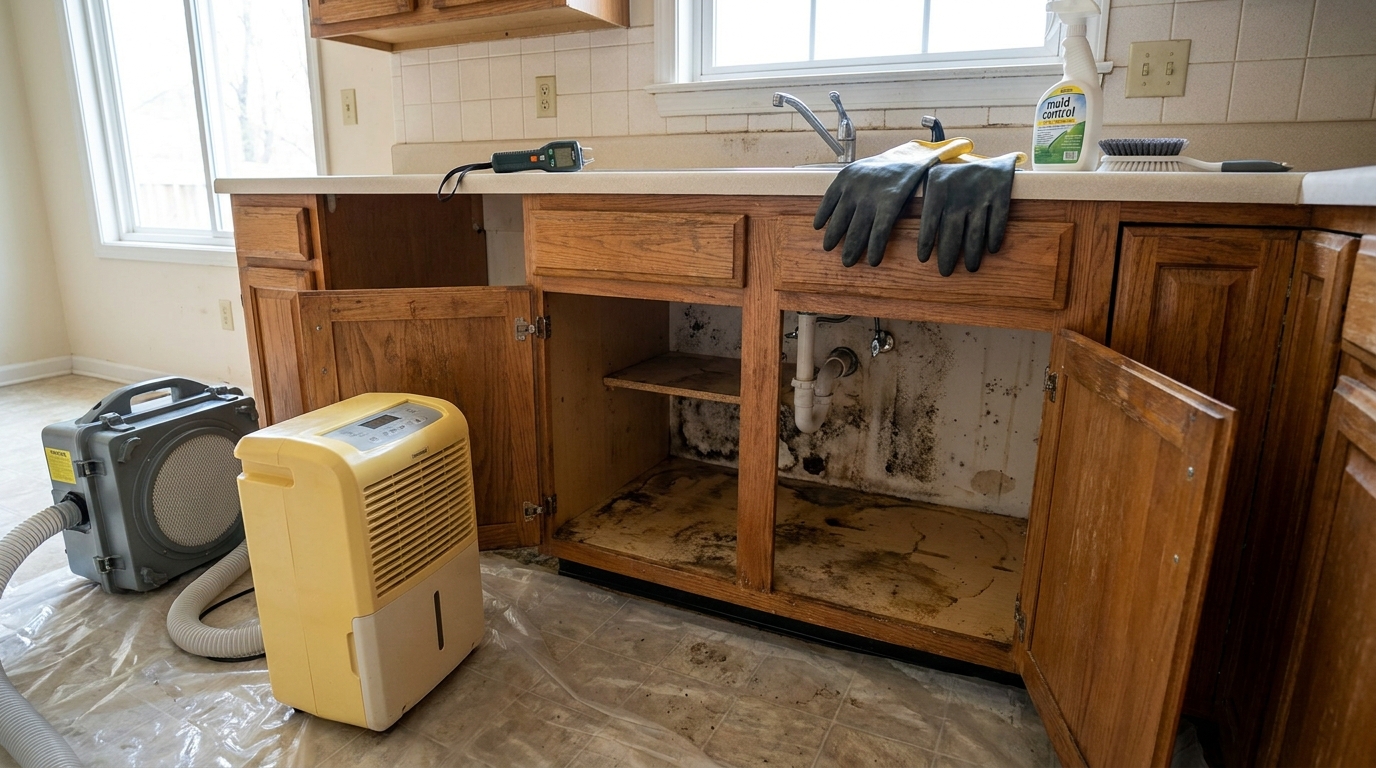
What Causes Mold Growth on Cabinets?
Cabinet mold grows when moisture from leaks, condensation, or high humidity combines with organic materials in wood, particle board, or food residue, typically in poorly ventilated areas.
Understanding cabinet mold removal starts with identifying why mold colonizes these spaces in the first place. Mold requires three conditions: sustained moisture, organic material to feed on, and temperatures between 40°F and 100°F. According to EcoFMR, kitchen cabinets combine consistent moisture, organic material, and favorable temperatures, making them among the highest-risk locations in a home. Humidity levels above 60% are specifically cited as favorable for mold development in cabinets. [Source: RestoAdvisor]
Under-sink leaks and plumbing condensation
Under-sink cabinets are particularly vulnerable because slow leaks from drain connections and garbage disposal seals can drip for weeks before anyone notices. Slow leaks from supply lines, drain connections, or the base of the sink are the most frequent culprits of cupboard mold. [Source: Kauffman Kitchens] Even minor plumbing condensation on cold water pipes creates enough persistent dampness to trigger growth.
Bathroom humidity and ventilation failures
Bathroom cabinets face daily exposure to steam from showers and baths. Without adequate exhaust fans, moisture settles on cabinet surfaces and penetrates joints. Poorly ventilated or tightly installed cabinetry traps this moisture, and stagnant air promotes mold development. [Source: Armadillo]
Kitchen steam and inadequate exhaust
Cooking, washing dishes, and boiling water all increase moisture levels near cabinets. These activities raise humidity in kitchens, especially near sinks and dishwashers. [Source: Kraus Restoration] Cabinets near dishwashers, refrigerators, and stoves face regular temperature swings that cause condensation to form on cabinet walls and drawer surfaces. [Source: Kauffman Kitchens]
Cabinet material vulnerabilities (particle board vs. solid wood)
Particle board, plywood, and laminate absorb water and, once wet, can actually feed mold growth. [Source: Kauffman Kitchens] Solid wood cabinets resist moisture penetration better than engineered materials, but even they’re susceptible when left damp. Particle board swells and delaminates when wet, creating internal voids where mold colonizes permanently.
Can You Remove Mold from Cabinets Yourself?
DIY cabinet mold removal works for surface growth under 10 square feet on non-porous materials when the moisture source is identified and fixable, but porous materials with deep penetration require professional assessment.
The 10-square-foot EPA threshold
The EPA’s guideline for homeowner-level mold cleanup is approximately 10 square feet of affected area. You can safely remove small, surface mold from cabinets yourself if the affected area is limited to under about 10 square feet and the material is not deeply contaminated. [Source: EcoFMR] Larger areas, recurring growth, or hidden mold behind walls should be handled by a professional mold remediation company.
Surface mold vs. structural penetration
Surface mold appears as discoloration on painted or sealed cabinet faces. It wipes away relatively easily and hasn’t compromised the material beneath. Structural penetration means mold has grown into the substrate itself. You can test this by pressing the material: if it’s soft, spongy, or crumbles, the mold has gone deeper than any surface cleaner can reach.
When cabinet material determines the approach
The decision tree is straightforward:
-
Sealed/painted solid wood: Surface mold can typically be cleaned with appropriate fungicides.
-
Unfinished solid wood: Mold may penetrate grain; sanding and treating may work for shallow growth.
-
Particle board or MDF: Once mold penetrates (which happens quickly due to porosity), cleaning is rarely effective. Replacement is usually necessary.
Health considerations for DIY cleaning
Disturbing mold releases spores into the air. Wear an N95 or higher respirator, gloves, and eye protection during any mold cleaning. [Source: Armadillo] People with respiratory conditions, compromised immune systems, or mold allergies should not attempt DIY removal. Consult a physician if you experience symptoms after mold exposure.
What Cleaning Products Actually Kill Mold on Cabinets?
Effective mold-killing products for cabinets include hydrogen peroxide (3%), distilled white vinegar, or EPA-registered fungicides. Bleach only works on non-porous surfaces and doesn’t penetrate wood grain.
| Cleaning Agent | Spore Kill Rate | Best For | Limitations |
|---|---|---|---|
| Bleach (5–6% sodium hypochlorite) | 100% on non-porous surfaces | Sealed wood, laminate, metal | May discolor unfinished wood; doesn’t penetrate porous materials |
| Hydrogen peroxide (3%) | 99–100% on porous and non-porous | Unfinished wood, MDF edges, painted surfaces | Spot-test for discoloration on light finishes |
| Distilled white vinegar (5% acetic acid) | ~82% of mold species | Light surface mold, maintenance cleaning | Less effective on porous surfaces (<70%) |
| EPA-registered fungicides | Varies by product (up to 99.9%) | Heavy growth, professional-grade applications | Higher cost; follow label directions exactly |
Data compiled from Crafted4You and DG Floors.
Why bleach fails on porous cabinet materials
Bleach achieves a 100% spore kill rate on non-porous surfaces like sealed wood and laminate. [Source: Crafted4You] However, on porous materials like unfinished wood or particle board, bleach’s water content gets absorbed while the active chlorine stays on the surface. This means mold roots (hyphae) survive deep in the material. Worse, the residual moisture can actually feed remaining mold if the surface isn’t dried thoroughly.
Hydrogen peroxide for wood and painted surfaces
A standard 3% hydrogen peroxide solution achieves 99–100% effectiveness at killing mold spores on both porous and non-porous surfaces. [Source: Crafted4You] Spray it directly on the affected area, let it sit for 10–15 minutes, then wipe clean. It’s more effective than bleach on unfinished or porous wood because it can penetrate below the surface. It also produces minimal odor and is less likely to discolor finishes.
Vinegar for light surface mold
Distilled white vinegar (about 5% acetic acid) kills approximately 82% of mold species. [Source: DG Floors] White vinegar kills 80% of mold species naturally. [Source: Advanced Restoration] Apply undiluted or mixed 1:1 with water, let sit 10–15 minutes, then scrub and wipe dry. Vinegar is best for light surface mold and maintenance cleaning rather than heavy infestations.
Commercial fungicides: when they’re worth it
EPA-registered mold removers are worth considering for moderate infestations on valuable cabinetry. Tested products like Mold Armor are formulated to kill mold and mildew and help prevent regrowth, with some claiming to kill 99.9% of mold and mildew germs in 5 minutes on hard surfaces. [Source: Good Housekeeping] Always verify the product is labeled for your specific cabinet material.
How Do You Safely Remove Mold from Kitchen Cabinets?
Safe kitchen cabinet mold removal requires containment with plastic sheeting, N95 respirator protection, HEPA vacuum cleanup, cleaning with appropriate fungicide, and addressing the moisture source before reassembly.
Containment and personal protection setup
Before touching any mold on kitchen cabinets, set up containment and protection:
-
Seal the work area with plastic sheeting and painter’s tape to prevent spore migration
-
Wear an N95 respirator (minimum), rubber gloves, and safety goggles
-
Turn off HVAC systems or seal nearby vents to prevent spore circulation
-
Open a window in the work area if possible for fresh air exchange
-
Remove all food, dishes, and stored items from affected cabinets
Step-by-step cleaning process for cabinet exteriors
-
HEPA vacuum visible mold to capture loose spores before wet cleaning
-
Apply your chosen cleaning solution (hydrogen peroxide for porous surfaces, bleach solution for sealed surfaces)
-
Allow 10–15 minutes of contact time for the solution to work
-
Scrub with a stiff brush, working in one direction to avoid spreading
-
Wipe with clean, damp cloths, changing frequently
-
Dry thoroughly with fans or dehumidifier—never leave surfaces damp
Interior cabinet cleaning and drying
Empty all contents and discard porous items that show mold (cardboard, paper liners, fabric). Clean interior surfaces using the same method as exteriors. Pay special attention to corners, shelf pin holes, and joints where moisture collects. After cleaning, leave cabinet doors open and run a fan for 24–48 hours to ensure complete drying before restocking.
Post-cleaning verification and prevention
After cleaning, monitor the area for 2–4 weeks. If mold returns, the moisture source hasn’t been addressed, or the mold has penetrated deeper than surface cleaning can reach. Consider applying a mold-resistant primer or paint to cleaned cabinet interiors as an additional barrier.
When Should Cabinets Be Replaced Instead of Cleaned?
Cabinet replacement becomes necessary when mold has penetrated particle board or MDF, caused structural warping or delamination, spread behind cabinet backs into walls, or repeatedly returns after proper cleaning.
Particle board and MDF: the replacement threshold
Particle board and MDF are essentially sponges for moisture. Once water penetrates these materials, mold colonizes internally where no surface treatment can reach. If particle board cabinets show swelling, softness, or crumbling at edges, replacement is the only reliable solution. The material cannot be restored to a mold-free state once compromised.
Structural damage indicators
Look for these signs that cleaning won’t be sufficient:
-
Wood that’s soft or crumbles when pressed
-
Visible warping, bowing, or delamination of cabinet panels
-
Persistent musty odor even after thorough cleaning and drying
-
Discoloration that extends through the material (not just surface staining)
-
Hardware pulling loose from weakened material
Water damage, structural weakness, mold growth, persistent odors, and hardware failure are the top 5 warning signs requiring cabinet replacement, and multiple warning signs appearing together indicate immediate replacement needs. [Source: Classic Cabinetry]
Hidden mold behind cabinet assemblies
Mold behind kitchen cabinets most commonly results from leaking pipes, condensation, or water seeping through unsealed countertops and backsplashes. If you smell mold but can’t see it on cabinet surfaces, it may have spread behind the cabinet assembly into the wall cavity. This situation requires professional assessment, as removing cabinets to access wall mold is beyond typical DIY scope.
Cost-benefit analysis: cleaning vs. replacement
When annual repair costs exceed 15% of replacement cost, replacement provides better long-term value. [Source: Classic Cabinetry] When repair costs exceed 50% of the price of new cabinets, replacement is usually the better option. [Source: Decor Cabinets] Industry practitioners typically estimate DIY mold cleaning supplies at $20–75, while single cabinet replacement ranges from $150–600 depending on material and style, and professional remediation for a contained area runs $500–3,000.
How Do You Remove Mold from Under Sink Cabinets?
Under-sink mold removal requires fixing the leak or condensation source first, removing damaged materials if necessary, cleaning surfaces with fungicide, ensuring complete drying, and installing moisture barriers or improved ventilation.
The mold under sink cabinet scenario is the most common cabinet mold situation homeowners face. The enclosed, dark space combined with plumbing connections creates ideal conditions for undetected growth.
Identifying and fixing moisture sources
Before any cleaning, identify and fix the water source:
-
Run water and check all visible connections for drips
-
Inspect the P-trap, supply line connections, and garbage disposal seal
-
Check for condensation on cold water pipes (insulate with foam sleeves)
-
Look for water stains that indicate intermittent leaks from above
Do not proceed with mold cleaning until the moisture source is resolved. Cleaning without fixing the source guarantees recurrence.
Removing and inspecting cabinet bottoms
Many under-sink cabinet bottoms are made from thin particle board that deteriorates quickly when wet. If the bottom panel is swollen, soft, or delaminated, cut it out and replace it. In some cases, the bottom can be removed entirely, cleaned underneath, and a new piece of sealed plywood installed as a replacement.
Cleaning techniques for confined spaces
A bleach solution of 1 part bleach to 4 parts water works for cleaning mold under sinks on non-porous surfaces. [Source: Frontdoor] For porous cabinet materials, use 3% hydrogen peroxide instead. Apply with a spray bottle, allow 10–15 minutes of contact time, scrub with a stiff brush, and wipe clean. Never mix bleach with vinegar or ammonia, as this creates toxic gases—a critical safety concern in the confined space under a sink.
Prevention: drip trays, ventilation, and monitoring
After cleaning, implement these preventive measures:
-
Install a plastic or metal drip tray under plumbing connections
-
Add a battery-operated water leak detector ($10–20) for early warning
-
Leave the cabinet door slightly ajar periodically to allow air circulation
-
Place moisture absorbers (silica gel or desiccant containers) inside
-
Inspect monthly for any signs of new moisture or growth
What Do Professional Mold Remediators Do Differently?
Professional cabinet mold remediation includes moisture meter testing, HEPA-filtered negative air pressure containment, antimicrobial application to hidden areas, post-remediation verification testing, and documentation for insurance or resale purposes.
Moisture and mold testing capabilities
Professionals use pin-type and pinless moisture meters to determine whether mold has penetrated beyond visible surfaces. They can detect elevated moisture inside wall cavities, behind cabinet backs, and within cabinet substrates without destructive testing. This information determines whether cleaning is viable or replacement is necessary.
Containment and air filtration systems
Professional remediation uses HEPA-filtered negative air machines that create negative pressure in the work area. This means air flows into the containment zone rather than out, preventing spore migration to other rooms. This level of containment is particularly important when removing cabinets that may release large quantities of trapped spores.
Access to hidden mold behind cabinets
Professionals can safely remove cabinets to access and treat mold on wall surfaces behind them. They have the equipment to contain spore release during demolition and the expertise to assess whether wall materials (drywall, framing) also need remediation. A certified industrial hygienist can determine the full extent of contamination.
When professional help is cost-effective
Professional remediation makes financial sense when:
-
Mold covers more than 10 square feet
-
Growth has spread behind cabinets into wall cavities
-
Particle board or MDF shows deep penetration
-
Occupants have health conditions affected by mold exposure
-
Documentation is needed for insurance claims or property sales
-
Mold returns after proper DIY cleaning attempts
How Do You Prevent Mold from Returning to Cabinets?
Preventing cabinet mold recurrence requires maintaining indoor humidity below 50%, fixing leaks immediately, ensuring proper ventilation in kitchens and bathrooms, and regularly inspecting vulnerable areas like under-sink cabinets.
Humidity control and dehumidification
The EPA advises keeping indoor humidity between 30–50% to prevent mold growth. [Source: Innovative Home Storage] Use a digital hygrometer to monitor levels. If humidity consistently exceeds 50%, run a dehumidifier or air conditioning. Place moisture absorbers like silica gel packets inside enclosed cabinets to keep micro-humidity down between inspections. [Source: Kraus Restoration]
Ventilation improvements for kitchens and bathrooms
Run exhaust fans during and for 15–30 minutes after cooking, showering, or running the dishwasher. Ensure range hoods vent to the exterior rather than recirculating. In bathrooms, a fan rated for the room’s square footage should run during every shower. Consider leaving cabinet doors open periodically, especially in humid seasons, to allow air exchange.
Regular inspection schedules
Check under-sink cabinets monthly for any signs of moisture, musty odors, or discoloration. Inspect plumbing connections quarterly. After any plumbing work, check daily for a week to catch slow leaks early. A quick visual inspection takes 30 seconds and can prevent weeks of hidden mold growth. For more guidance on maintaining kitchen cabinets and fixtures, establish a routine that includes both visual checks and moisture monitoring.
Cabinet material choices for high-moisture areas
When replacing cabinets in moisture-prone areas, choose materials that resist mold colonization:
-
Marine-grade plywood: Resists moisture penetration far better than particle board
-
Solid wood with sealed finish: Provides a non-porous barrier when properly maintained
-
PVC or thermofoil: Non-porous, won’t absorb moisture
-
Stainless steel (under-sink): Completely mold-resistant for base cabinet interiors
Avoid particle board and unsealed MDF in any location where moisture exposure is likely.
If cabinet mold has spread beyond surface areas, penetrated porous materials, or keeps returning despite your efforts, consult a certified mold inspector to assess whether cleaning or replacement is the safer long-term solution.
Frequently Asked Questions
Is mold on kitchen cabinets dangerous to health?
Mold exposure can cause respiratory irritation, allergic reactions, and other symptoms in sensitive individuals. The severity depends on mold type, exposure duration, and personal health factors. Anyone experiencing symptoms after discovering cabinet mold should consult a physician for guidance specific to their situation.
Can I paint over mold on cabinets to seal it in?
Painting over active mold does not kill it. Mold can continue growing beneath paint, eventually breaking through the surface. Always clean and kill mold completely before applying any primer or paint. A mold-resistant primer can be applied after successful remediation as a preventive layer.
How quickly does mold grow in cabinets after a leak?
Mold can begin colonizing damp surfaces within 24–48 hours under favorable conditions (temperatures between 40–100°F and humidity above 60%). This is why prompt leak repair and drying are critical. A leak left unaddressed for even a few days can produce visible mold growth.
Does vinegar or bleach work better for cabinet mold?
It depends on the cabinet material. Bleach achieves 100% spore kill on non-porous sealed surfaces but fails on porous materials. Vinegar kills about 82% of mold species and is safer for most surfaces. For porous wood cabinets, 3% hydrogen peroxide (99–100% effectiveness on porous and non-porous surfaces) is typically the best choice. [Source: Crafted4You]
How do I know if mold has gone behind my cabinets into the wall?
Signs include persistent musty odor even after cleaning visible mold, water stains on walls adjacent to cabinets, bubbling or peeling paint on nearby wall surfaces, and mold appearing on the back panel of the cabinet. A professional with a moisture meter can assess wall cavities without removing the cabinets.
Should I test cabinet mold to identify the species?
For most homeowners, species identification isn’t necessary before cleaning. The remediation approach is the same regardless of mold type. Testing becomes valuable when health symptoms are present, for insurance documentation, or when a professional needs to determine the extent of contamination behind walls or in HVAC systems.
Can I save particle board cabinets that have mold?
Surface mold on particle board that hasn’t penetrated the material can sometimes be cleaned. However, if the particle board is swollen, soft, crumbling, or shows mold staining that extends through the material, replacement is necessary. Particle board absorbs water readily, making deep mold penetration common even from brief moisture exposure.
How much does professional cabinet mold remediation cost?
Industry practitioners typically report costs ranging from $500–3,000 for contained cabinet mold remediation, depending on the extent of contamination, number of cabinets affected, and whether wall remediation is needed. DIY cleaning supplies typically cost $20–75, while individual cabinet replacement ranges from $150–600 per unit depending on material and style.